
Sharex As a free screenshot tool and open source that everyone uses Windows should know. It not only replaces the perfect Snipping Tool but also provides a powerful feature. Let’s explore why this software is so popular!
| Join the channel Telegram belong to Anonyviet 👉 Link 👈 |
What is Sharex?
Basically, Sharex As a screen capture and screen recording tool, similar to Snipping Tool. Click a key combination (default to Ctrl + Print Screen), and you have a screenshot. But that’s only the floating part of the submerged iceberg. Sharex’s true power lies in the ability to customize deeply and a huge feature that the default Windows tool can only dream.
This is an open source project, which means it is completely free, developed by the community and continuously updated. You will not have to pay a penny to own a professional, powerful and constantly improved tool.
The breakthrough features of sharex
When placed Sharex And Snipping Tool on the scale, the difference becomes clear. Sharex not only can do everything that Snipping Tool can, but also raise them to a new level and add dozens of other useful functions.
Take unexpectedly flexible photos
Windows Snipping Tool only offers a few basic options: shooting full screen, taking a window in operation, taking a rectangle or a simple video recording.
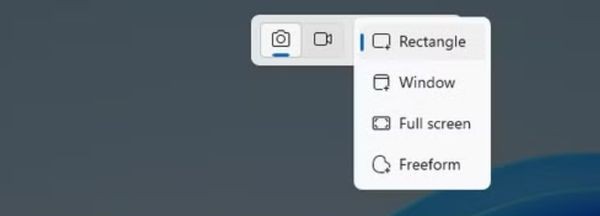
Sharex has turned that simplicity into a real creative playground:
Scrolling Capture
This is a “end” feature for anyone who has ever tried to take a long website, a chat or a multi -page document. Instead of having to take a lot of photos and then manually, Sharex allows you to just a click to capture the entire content from start to finish, creating a single, seamless image.
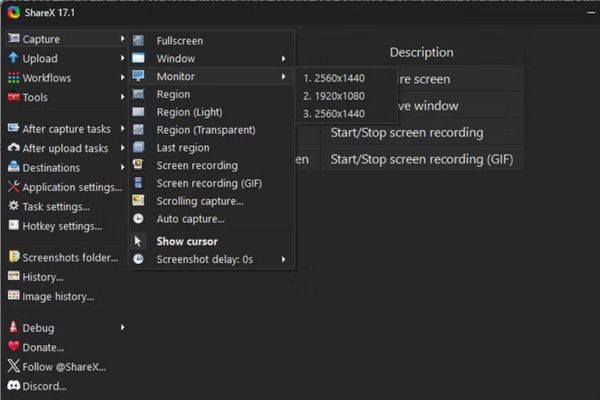
Dynamic gif
Do you want to create a quick guide, a funny meme or record a small interface error? Sharex’s GIF feature allows you to record a screen area and save it as a dynamic GIF image, extremely convenient to share quickly without the complex video editing software.
Automatic (AutoCapture)
A specialized but extremely useful feature. You can set up Sharex to automatically take screenshots in a certain period of time (for example: 5 seconds once). This is great when you want to record the process of a presentation, an online lesson without wanting to be interrupted.
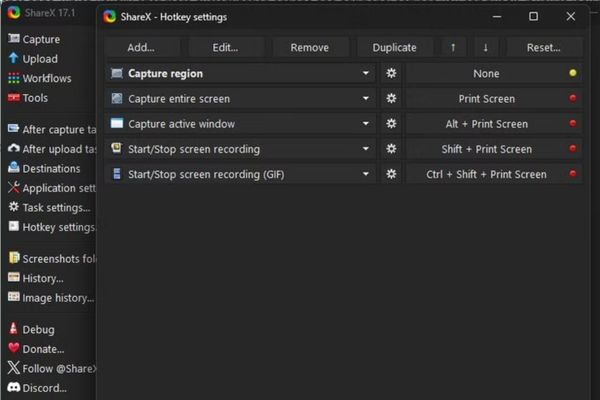
Completely customized shortcut
Unlike Snipping Tool, Sharex allows you to assign any key combination to all actions. You can set up the most convenient shortcuts for yourself, even assign them to the extra buttons on the gaming mouse to perform the photography operation with just one press, speed up the working speed significantly.
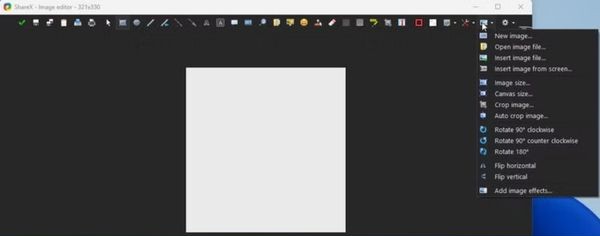
Powerful photo editing process
The Snipping Tool’s editing process only stops at a basic level with a few pens, highlights and trimming. In contrast, Sharex’s editing process is like a miniature version of Microsoft Paint, which is “injected with doping dose”. Immediately after shooting, a editing window will appear with full professional tools:
- Fuzzy and pixelate: Need to cover sensitive information such as email, phone number or password? Blur and pixel interference (Pixelate) help you do this professionally and quickly.
- Add diverse notes: You can draw cubes (arrows, rectangles, ellipse), add text, insert stickers and emoji to make your photos more vivid and understandable.
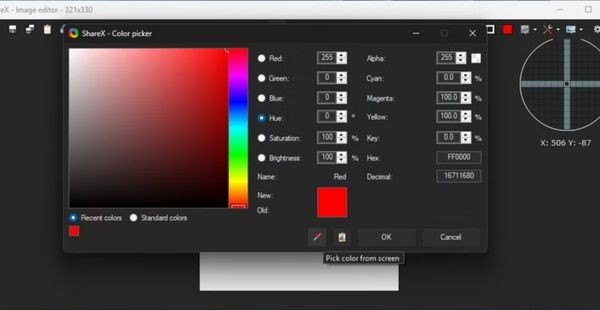
- Color Picker: This is a small but extremely expensive detail. It allows you to choose any color from the screenshot to use for your captions, creating absolute synchronization and professionalism.
- Other tools: Cut, rotate, change the size, add the border effect, pour the ball … Everything you need to complete a caption is present.
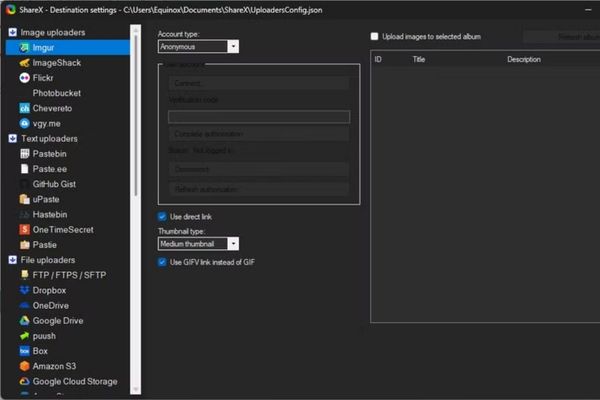
Cloud synchronization and easy sharing
Snipping Tool can automatically save photos into the folder OneDrive yours, but that’s just that. Sharex opened up a vast connected world. It supports more than 20 uploading services to files, text and cloud storage right from the installation, including familiar names such as Imgur, Google Drive, Dropbox, OneDrive, …
Even if you use a personal storage service (Self-Host), Sharex also allows you to configure to automatically upload to your own server. This ability turns screenshots from a multi -step process (shooting -> saving -> opening a browser -> uploading -> copying links) into a single, seamless action.
Some important notes when using Sharex
The power is always accompanied by complexity, and Sharex is no exception. There are two points you should note when starting the journey with this tool.
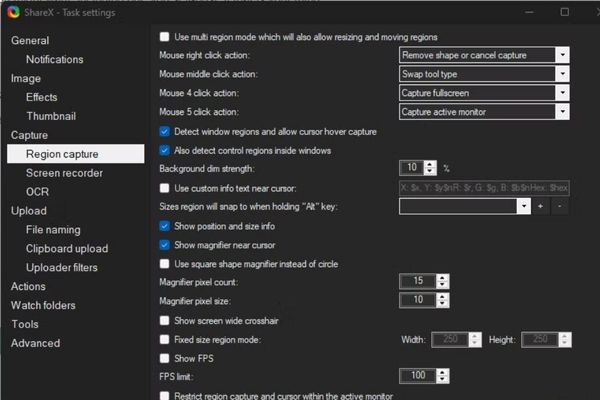
Interface many options and need time to get acquainted
The only minus point, if possible, is the huge number of options of Sharex. Its installation interface can make new users feel overwhelmed. However, do not let that discourage you. Consider it as a testament to its customization power. The default settings are good enough for most needs, and you can slowly discover advanced settings when you are more familiar.
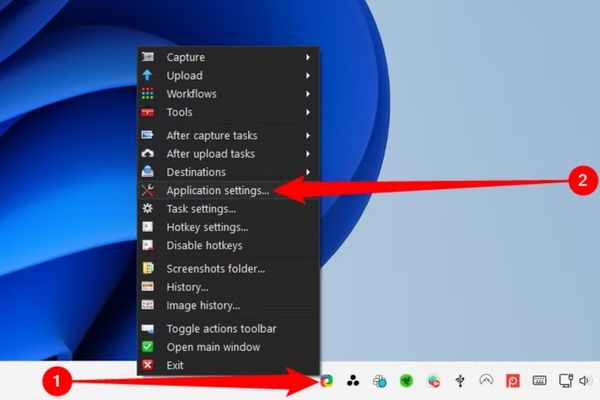
Please turn off the automatic uploading feature
This is an extremely important point that every user must know. Sharex is the default configuration to automatically download all your screenshots to a public cloud service (IMGUR) without notifying it. This can cause leakage of personal information or sensitive data if you do not notice.
We really recommend this feature immediately. How to do it is very simple:
- Right -click on Sharex icon on the taskbar and choose Application Settings.
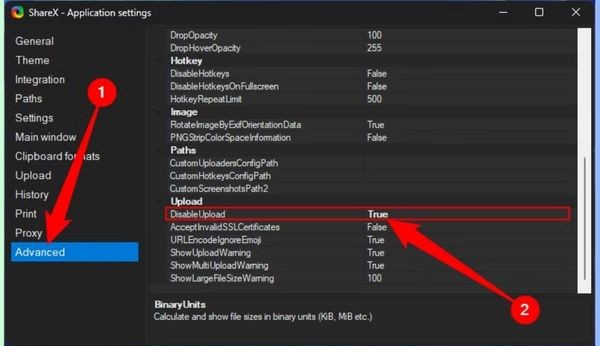
- In the installation window, select the tab “Advanced“In the left column.
- Roll down the section “UploadAnd find items Disableuuup.
- Click the button next to it to convert the value from “false” (wrong) to “True” (Correct).
To be sure, you can also block this application in your firewall. If you have uploaded a picture, you can delete it by entering the main window of Sharex, to History, right -click on the image and select Open> Deletion URL.
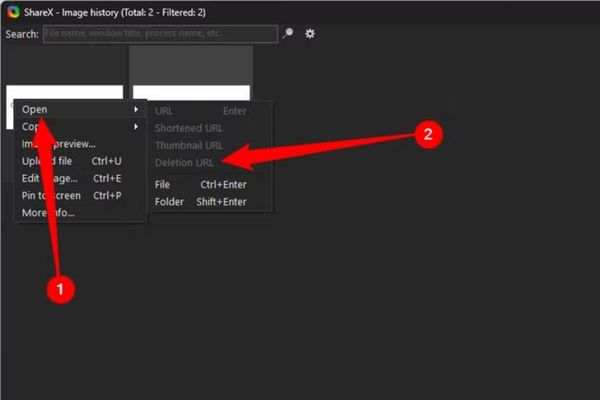 Select Open> Deletion URL
Conclusion
Sharex It has proven that it is not only a replacement, but a comprehensive upgrade for Snipping Tool. Do not hesitate to take some time to get acquainted and customize this powerful tool as you like. You will quickly realize it is an indispensable assistant in daily work.


