To be able to use Kali Linux or any Linux operating system on Windows 10, the first thing that comes to your mind is definitely a Virtual Machine, but I will show you how to install WSL on Windows 10 to run Kali Linux or any other. any other Linux operating system. Let’s find out with us!
| Join the channel Telegram of the AnonyViet 👉 Link 👈 |
What is WSL?
WSL or Window Subsystem for Linux is a subsystem for Window 10 to run EFI-based linux. WSL can be used on Windows 10, Window 11 and Window server 2019 for x64-based use and it allows to run Linux operating systems (GNU/Linux). Some things you can do with WSL:
- Find the operating system from the Microsoft Store. All those operating systems are 100% Free
- Run commands like normal linux like cd, grep, bash, apt,…. or any Linux 64-bit (ELF-64) binaries
- Run tools, programming languages, and services.
- Run Linux Applications on Windows
- Access Windows Files from Linux
Prepare
- For x64: Window needs to be version 1903 with Build 18362
- For ARM64: Windows needs to be 2004 version with Build 19041
Instructions for installing Kali linux on WSL
Installing Kali Linux on WSL will save you resources on Windows because there is no need to install additional VMWare.
To avoid future errors, please download after completing the steps below WSL2 Linux kernel update package for x64 machines to avoid future errors. Please install this first Reboot for WSL to work.
After the installation is complete, run the following command in PowerShell to set WSL 2 as default!
wsl --set-default-version 2
Then you check the WSL Version again. After checking, please Restart the computer
wsl --list --verbose
Enable Windows Subsystem for Linux and Virtual Machine
Method 1: Use Control Panel (with admin)
Step 1: Go to Control Panel
Step 2: Go to Program
Step 3: Select Turn Window Features on or off
Step 4: Check Windows Subsystem for Linux and Virtual Machine Platform. Then press OK
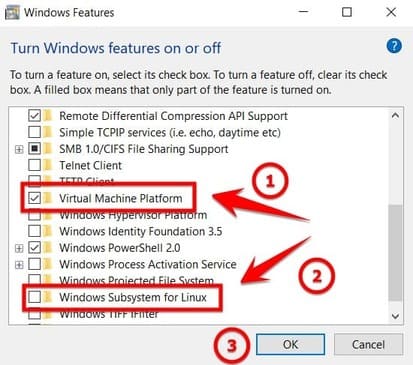
Step 5: Guys Restart your computer
Method 2: Use PowerShell
Step 1: Enter PowerShell with Administrator rights
Step 2: Enter the following command to enable Window Subsystem for Linux
dism.exe /online /enable-feature /featurename:Microsoft-Windows-Subsystem-Linux /all /norestart

Step 3: Enter the following command to enable Virtual Machine Platform
dism.exe /online /enable-feature /featurename:VirtualMachinePlatform /all /norestart
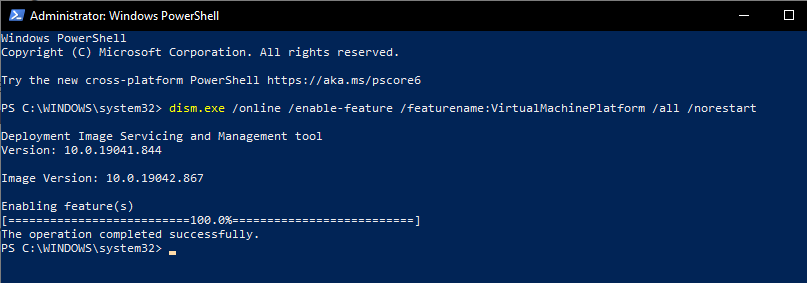
Step 4: Restart the computer
Install Kali Linux on Windows
Step 1: Go to Store on Windows or click this link
Step 2: Click Get to download Kali Linux
So you have completed the installation of Kali Linux on Windows 10. Now I will guide you to Set Up Kali Linux on WSL
Set Up Kali Linux WSL
Step 1: Click the Launch button on the Store or you can go to the Start Bar to enable Kali Linux for WSL
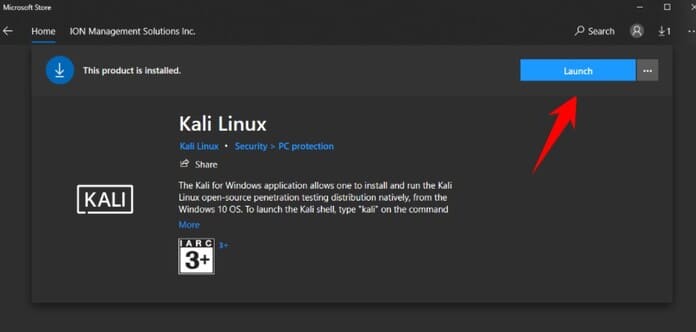
Step 2: Sit and wait for Kali Linux to automatically Set Up for you at first

Step 3: Then the screen will ask for the UNIX name and password. This is an account on WSL only, not an external account for Windows. After creating User, every time you turn on Linux, it will ask you to enter Username and Password for Kali Linux. You should avoid setting it indiscriminately or you will have to reinstall WSL to change the password.

Step 4: After entering the Linux command line interface, run the following command to update linux!. You run this command using the sudo command and enter the WSL password when prompted.
sudo apt update
sudo apt upgrade
sudo apt-get update
sudo apt-get upgrade
So you have already set up Kali Linux on WSL. For some of you who are familiar with Linux’s Graphical User Interface (GUI), you can follow the instructions below to install it!
Install GUI for Kali Linux on WSL
Win-KeX is an application that provides a user interface or GUI for Kali Desktop on WSL with the following features:
- Windows mode
- Seamless mode
- Audio support
- Unprivileged and Root session support
- Share Clipboard to Copy and Paste back and forth for Windows and Linux
- Multi-session support
Win-KeX supports from Window 10, Window 11, Window Server 2019 with Version 2004 and requires WSL2 (see instructions above).
Step 1: Run the command below to update
sudo apt update
Step 2 Install Win-KeX using the following command
sudo apt install -y kali-win-kex
Step 3: Start Win-KeX with the command
kex
After entering the command, they will ask for the password of Kali Linux. Enter your password and it will turn on automatically!
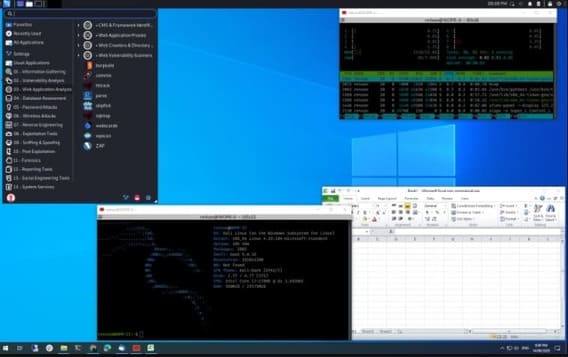
How to Remote Desktop Kali Linux
Install GUI for Kali Linux
Step 1: Update Kali linux with the following command
sudo apt update
sudo apt upgrade
Step 2: Install the GUI with the following command. Note that here I use Xfce for the lightest!
sudo apt install kali-desktop-xfce -y
Step 3: Install XRDP to be able to use with Remote Desktop Connection
sudo apt install xrdp -y
Step 4: Start XRDP
sudo service xrdp start
Using Remote Desktop Connection with WSL
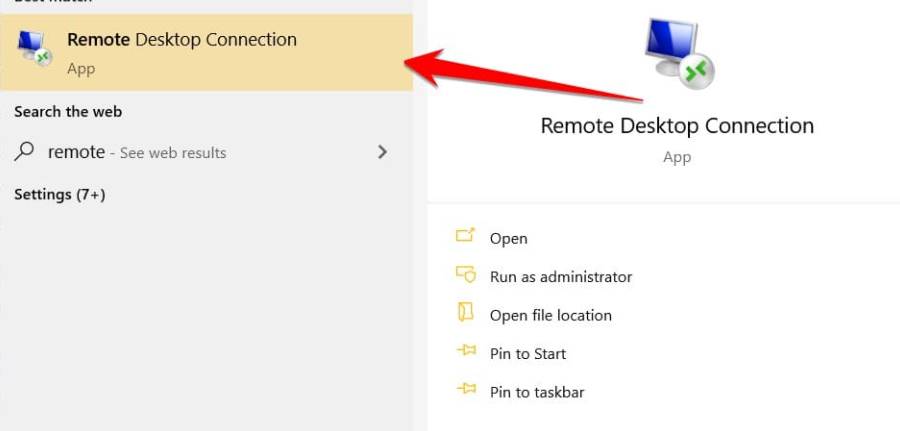
Step 1: In Contana, Find Remote Desktop Connection
Step 2: In the WSL command line, enter the following command to find the ip of Kali Linux
Ip a or ifconfig
Step 3: Enter the IP you just found in the Computer box.
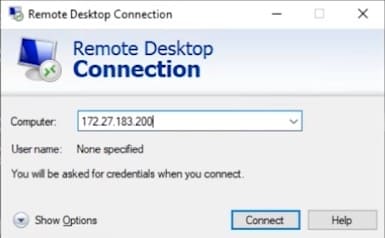
Step 4: After entering Done, a warning dialog box will appear, you just need to press ok
Step 5: After logging in, Enter Kali Linux’s Username and Password and you’re done!
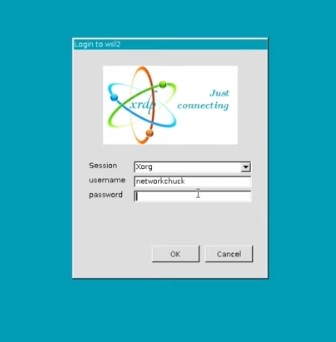
So I just finished showing you how to Use Kali Linux on Windows 10 with WSL. It’s convenient to use like that, isn’t it? If you have any comments, please leave a comment below to let me know! See also: Instructions to reset password for WSL Kali Linux here.








the kali linux app i downloded from the terminal has some issues, once i try to open it all it does is close immediately.
“Processing fstab with mount -a failed.
Failed to mount C:\, see dmesg for more details.
WSL (6) ERROR: CreateProcessEntryCommon:358: getpwuid(0) failed 2
WSL (6) ERROR: CreateProcessEntryCommon:362: getpwuid(0) failed 2
WSL (6) ERROR: CreateProcessEntryCommon:570: execvpe /bin/sh failed 2
WSL (6) ERROR: CreateProcessEntryCommon:579: Create process not expected to return
[process exited with code 1 (0x00000001)] ” I CAN ONLY SEE THE ERRORS ON WINDOWS TERMINAL SINCE THE KALI TERMINAL CLOSES IMMEDIATELY