
How to change DNS is a simple but effective solution if you encounter the situation of not being able to access Steam, due to major networks such as FPT and Viettel suddenly applying blocking measures.
| Join the channel Telegram belong to AnonyViet 👉 Link 👈 |
How do network operators block Steam?
Reports from the Vietnamese gaming community have recently indicated that they are inaccessible Steam via the networks of FPT, Viettel, VNPT since the afternoon of May 7. Some people believe that this may be part of a campaign to fight counterfeit goods and collect taxes from digital products. This causes great inconvenience for gamers when they cannot access their accounts and game libraries.
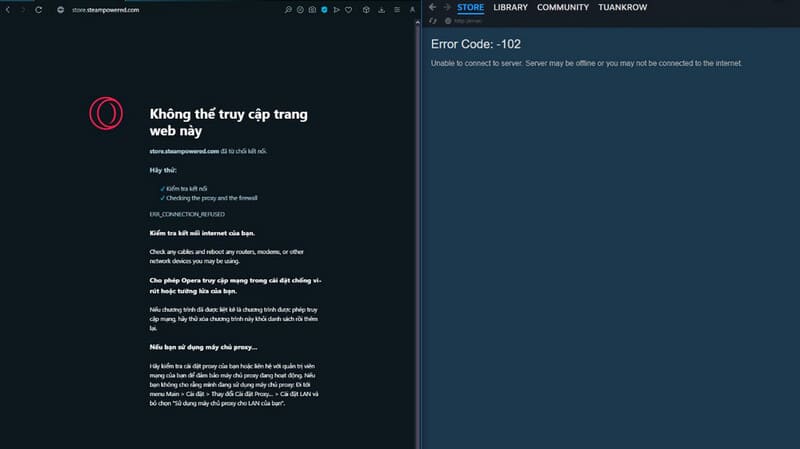
A member of the J2TEAM Community discovered that when trying to connect to the Steam Store, the IP address was redirected to localhost (127.0.0.1), preventing access. It is assumed that carriers have set up rules on the server or router to resolve the Steam Store domain name to a localhost IP address, similar to editing the Hosts file on Windows.
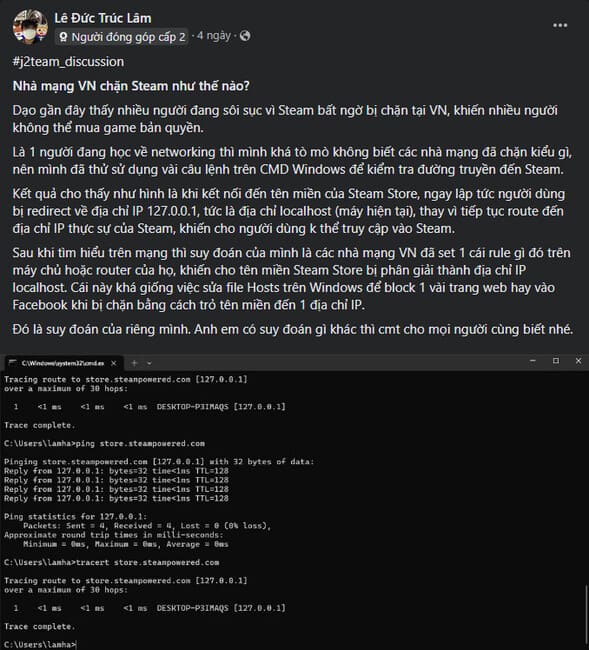
However, there has been no official announcement from the network service provider or from Steam, so the real reason behind it is still a mystery.
How to access blocked Steam using DNS
Instructions for changing DNS on Windows
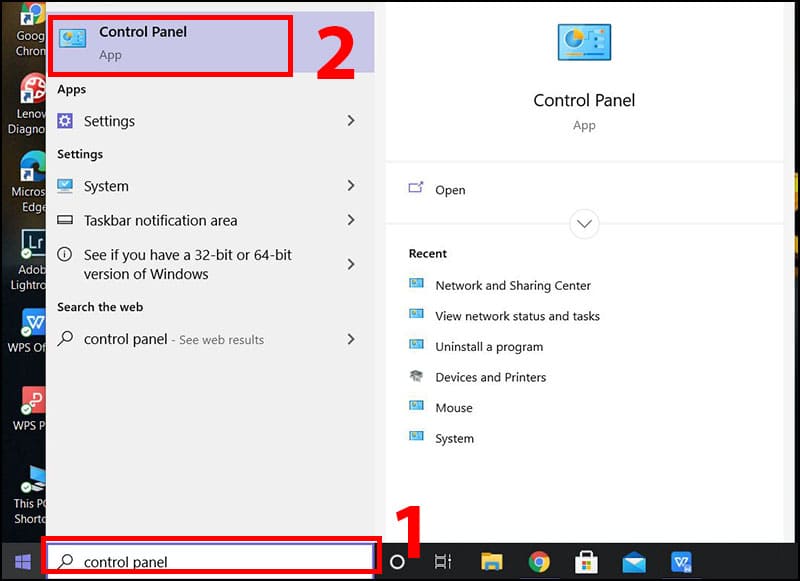
Step 1: Open Control Panel by entering “control panel” into the Windows search box and selecting the appropriate result.
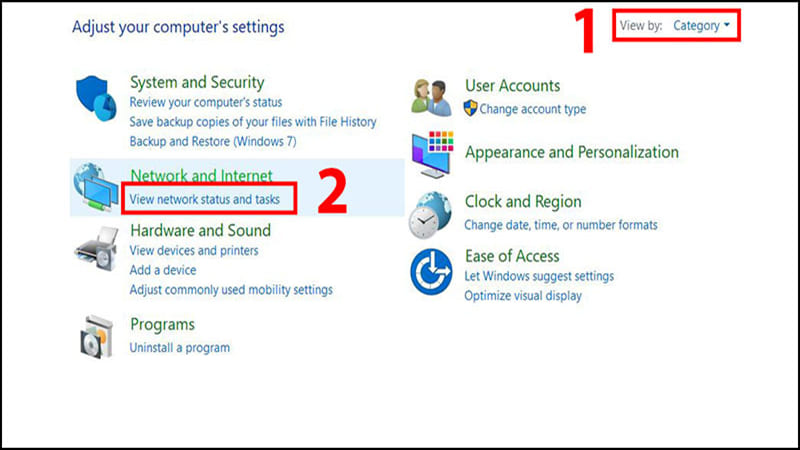
Step 2: In the Control Panel window, set the view mode to Category and continue selecting 'View network status and tasks'.
Step 3: In the Connections section, click on Wi-Fi to open the Wi-Fi Status window, then select 'Properties'.
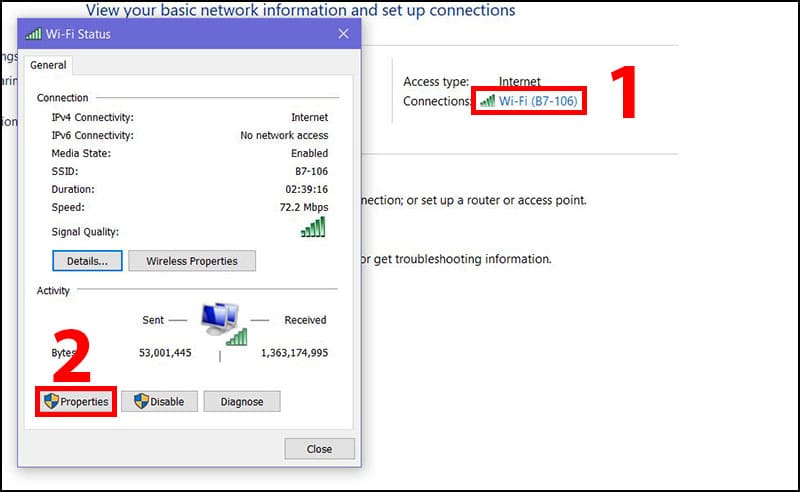
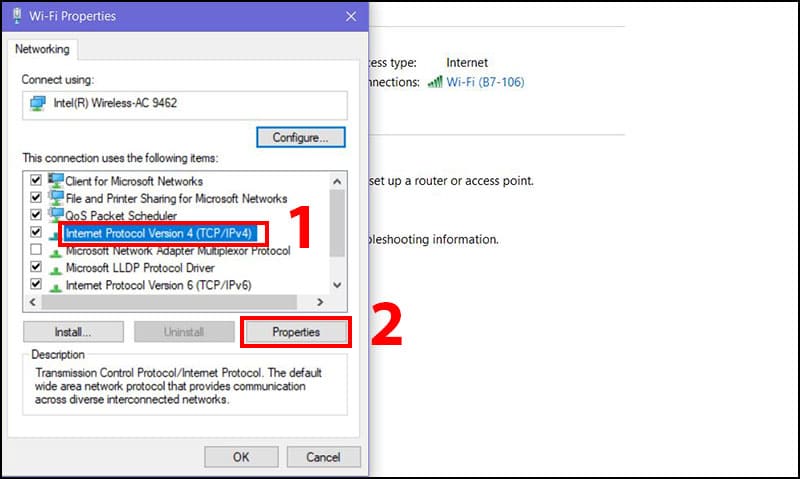
Step 4: In the list of options, find and select Internet Protocol Version 4 (TCP/IPv4) and press 'Properties'.
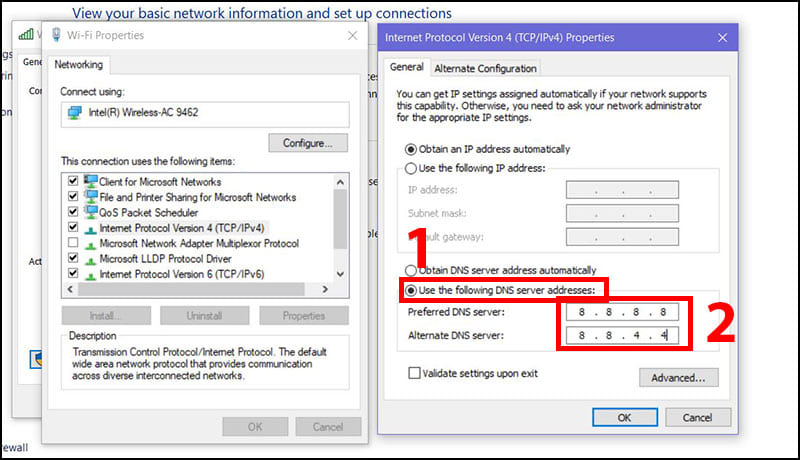
Step 5: Check 'Use the following DNS server addresses'. Fill in the desired DNS information in the Preferred DNS and Alternate DNS sections.
Step 6: Perform a restart of the computer system to update the changes made.
Instructions for changing DNS on MacOS
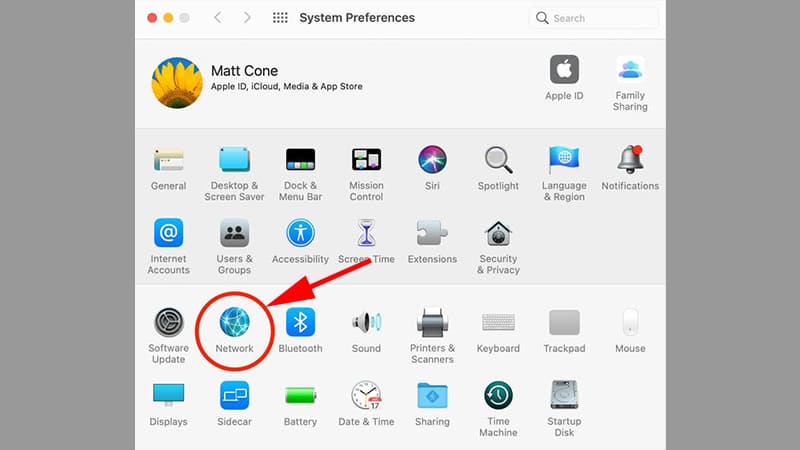
Step 1: To perform How to change DNS On your Mac, click the Apple icon in the upper left corner of the screen to open the Apple menu > Then select System Preferences.
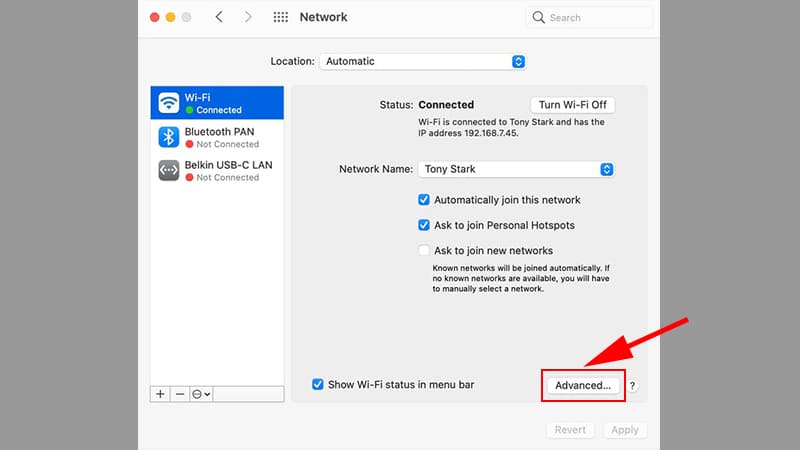
When the System Preferences window appears, go to the Network section.
Step 2: To edit network settings, click on the 'Advanced' button
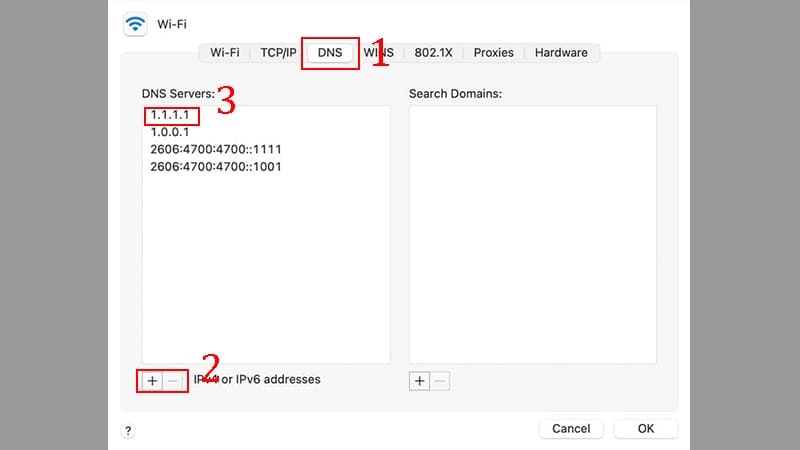
Step 3: In the DNS tab, click the plus “+” icon to enter the Preferred DNS address.
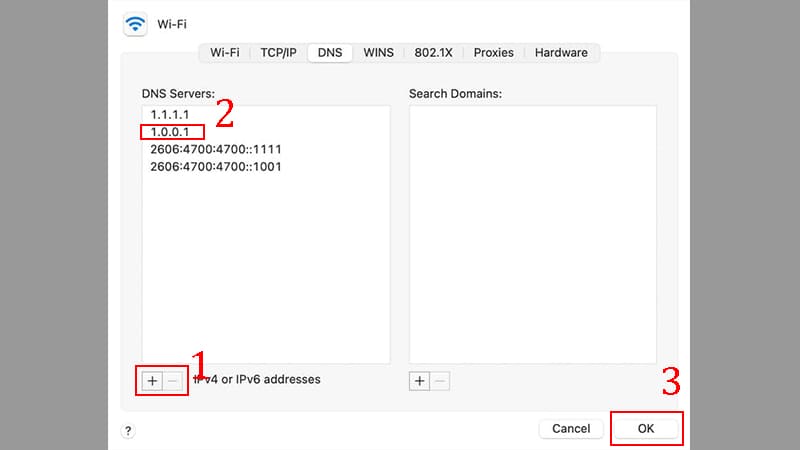
Step 4: Click the plus “+” icon again to add the Alternate DNS address. Then, click OK and Apply to apply the changes.
Free DNS addresses you can try
- Cloudflare: 1.1.1.1 and 1.0.0.1
- Google Public DNS: 8.8.8.8 and 8.8.4.4
- OpenDNS: 208.67.222.222 and 208.67.220.220
- NordVPN: 103.86.96.100 and 103.86.99.100
Note: Using VPN is not recommended as it may violate the terms of service Steam and resulted in the account being banned.
Epilogue
So, equal How to change DNS Following the instructions above, you can confidently access Steam without being affected by blocking from network operators. Wishing you success and great hours of entertainment on Steam!


