Ways to secure open source websites
Introduction head
When building a Website, the next thing we think about is how to protect our website from outside attacks, there are many methods to set up this defense. there is absolute security like the field game online are less likely to suffer the consequences of attacks, because they configure the web and the server very firmly.
| Join the channel Telegram of the AnonyViet 👉 Link 👈 |
However, nowadays WordPress is extremely familiar to us because of its beautiful, eye-catching themes and easy-to-use interfaces, its features are also many, so it has long been the choice of many young people. .
But it also has security flaws when we use it to ensure the safety of our own website from the eyes of people with bad intentions. This article will summarize some very important but very important Plugins and tips for you to build a Web-based website WordPress.
Some Tips
With the simple tips below, maybe anyone can do it and it shouldn’t be difficult for you!
1. Do not use the account name “admin”
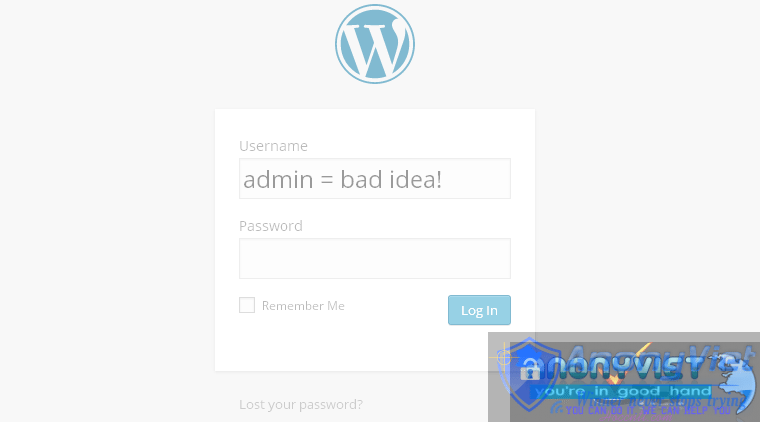
Why shouldn’t it be? Because this one is a popular account and too easy for hackers. According to the survey, most WordPress admins often leave the account name as “admin“or maybe”administrator” for easy remember but this is a big mistake for the form of attack Brute Force Attack (This is a form of attack based on the existing list of passwords and account names of the hackers and they will continuously log in on the website until they can access it).
So don’t make your username easy to guess like “admin” but instead give it a special name in your style!
2. Use complex passwords
Just like the account name, hackers can use the form Brute Force Attack to detect your password if it’s too simple. So set yourself a password that includes uppercase, lowercase letters, numbers and even characters. That’s how it’s safe.
And if you are not confident in the password you set yourself, you can use the software Strong Password Generator to create a strong enough password.
3. Update plugin, theme, WordPress to the latest version
Every time there is an updated version or a new login, there is an update notification! That’s when you should not ignore it because some old versions have fatal vulnerabilities that are not foreseen!
4. Use Hhigh quality ost
You should use a host from a real provider instead of using a regular host service (Shared Host).
The reason is that shared hosts are all located on the same server system as other websites, so as long as one website is infected with malicious code, other websites are also at risk of being attacked through the form of malicious code. Local Attack.
Recommended Security Plugins For WordPress
1. Login Ninja
This plugin helps protect login & register forms with captcha and will Auto Ban IP address, automatically redirect users to the page based on permissions and username.
Automatically send notifications of illegal login users to gmail for easier control and timely prevention.
2. Hide My WP

If you don’t want outsiders to know that we use WordPress source code to build a website, this is a great solution for you!
3. UpdraftPlus Backup and restoration

This is a plugin that automatically saves data on your website to a third-party storage site like Google Drive, Dropbox, etc.
4. All In One WP Security & Firewall

It can be said that WordPress itself is also quite secure.
But if you install this, your site will be more secure!
5. BulletProof Security

This is a plugin that helps you to resist more than 100000 types of attacks by hackers gathered around the world.
6. IThemesS Security:
User manual iThemes Security
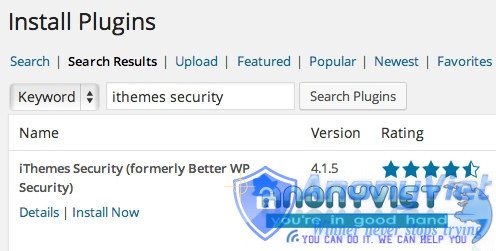
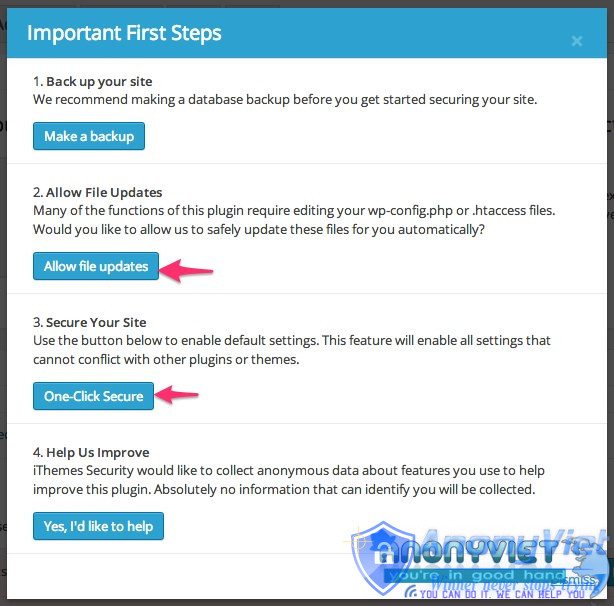
When the installation is complete, press Secure Your Site Now to begin

And next you choose two options as shown in the picture and press the button Dismiss to finish.
Next switch to tab Settings and we will learn about its features!
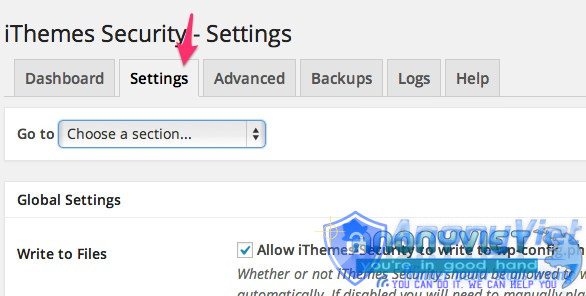
There is a Go to section that is a navigation bar, when you select each section in it, the window will lead you to the corresponding area to set up. Let’s find out the options of iThemes Security below.
Introducing the features of iThemes Security
Global Settings
The basic settings for iThemes Security are located here. I will explain below…
- Write to File — Other plugins will automatically add content to wp-config.php and .htaccess files, you should choose it to be able to install other iThemes Security features or caching plugins automatically and without having to manually install each one. the Plugin and encountered an error of installing the missing Plugin, so leave this Auto mode.
- Notification Email– Notifications will be sent to your email to promptly prevent threats named Hacker!
For iThemes Security Plugin, you can add multiple emails separated by a row.
- Backup Delivery Email –if you back up your data with iThemes Securtity it will also be set to be sent to your email. And it will be absolutely safe via Google Email.
- Host Lockout Message –Those who cannot log in due to IP lockout will be automatically sent messages via this feature.
- User Lockout Message – If a member is locked or banned when posting comments on the page, you will receive an error message.
- Blacklist Repeat Offender – Blacklist for public news Spam addresses and it is also auto. I recommend using this feature to avoid Spam on your website and bring more aesthetics in the Comment section.
- Blacklist Threshold – Will permanently block IP on the website if it is locked for a preset number of times.
- Blacklist Lookback Period – Set a time limit to block spammers listed in the Blacklist Repeat Offender section above, after expiration they can use them normally again.
- Lockout Period – Set a lock period for each failed login attempt. After this period has expired, you can log in normally again.
- Lockout White List – White list (clean) IP will not be locked.
- Email Lockout Notifications – When someone is locked for some reason, it will be sent to your Email. So that you can control and avoid the case of Locking the wrong person
- Log Type – Should choose Database Only. This is a log file that records specific and detailed activities of the Plugin.
- Days to Keep Database Logs –Set a deadline for the above Log, when due will be scheduled to delete the old ones to make the File less heavy.
- Path to Log Files – The path of the log file.
- Allow Data Tracking – Allow iThemes to collect your usage data for them to analyze.
Every time a member visits your website and has an error, a notification will be sent to your Email so that it can be fixed. But if the website has too many errors, you should not turn on this feature because your Email inbox will be a bunch of Spam!
- Minutes to Remember 404 Error (Check Period) – Set the time period for the system to automatically log errors.
- Error Threshold – For Spam or Spammer bots, there will be many 404 errors. If the number of errors is too many within the specified time period, it will be Banned.
- 404 File/Folder White List – Selected Files or Folders will be whitelisted and not checked for errors!!
Away Mode
For Websites with only one or a few Admins, this feature is quite necessary. This feature allows you to disable your admin page to ensure safety while eating, studying, sleeping, playing games, having sex…
- Enable away mode: this is read to understand so I will not explain further!
- Type of Restriction – If you access the web every day, choose Daily
- Start Time – Timer start Allow access to admin page.
- End Time – Timer to close the admin page portal.
Banned User
Banned means banned 😀 For Bots or Spammers, it’s very necessary!
- Enable HackRepair.com’s blacklist feature –The Spam Bots listed on HackRepair.com will be Banned if you Enable this feature.
- Enable ban users – The function of permanently locking someone who is not a member of your site. This is also easy to understand, so please excuse me not to say more
- Board Hosts – This is essentially the IP ban according to the available list. Each IP is a line in the list.
- Board User Agents –You can go to Google and type “Bad User Agents list” to get the list of spam bots!
- Whitelist Users – IP will not be banned (White List).
Brute Force Protection
Brute Force Attack is a form of attack by method of password detection according to the available list! This trick will continuously log in with different passwords in the list until you can log in.
This option will help you fight Brute Force Attack by limiting the number of false login attempts. And will be the countermeasure of Hackers who specialize in password detection with Brute Force Attack.
- Enable brute force protection – Activate function
- Max Login Attempts Per Host – Limit the number of login times per IP.
- Max Login Attempts Per User – Limit the number of login times per member.
- Minutes to Remember Bad Login (check period) – Set the interval for the number of false login attempts. During this period, if you continue to log in incorrectly, you will be locked even if you are a member.
File Change Detection
It is quite resource intensive for this feature. It will notify when any file in the Host is changed for you to promptly avoid inserting a shell.
- Enable File Change detection – Activate the function.
- Split File Scanning – Reduce more resources by splitting files to scan.
- Include/Exclude Files and Folders – Include or remove detected files/folders.
- Files and Folders List – list of folders you want to remove for Scan.
- Ignore File Types – Files will be ignored if the format is set by you
- Email File Change Notifications –Send email notifications.
- Hide Login Area
Change (Hide) the login path instead of keeping the old path (the path is too simple) and will help you avoid hackers quite well.
- Login Slug – New login slug for your website. If you write Fuckall then your login path will be Website.com/Fuckall
- Register Slug – Same as above but this is the link for Register.
- Enable Theme Compatibility – Compatible with the theme automatically if you enable it.
- Theme Compatibility Slug – 404 error path.
Strong Password
- Enable strong password enforcement – In order to increase the security of the Website, this will be a feature that requires members to set a strong password
Advanced Features
These are advanced settings, limited to machine if you are afraid of errors or best backup the entire database and code before using the tools here.
Admin User
The changes herein will affect the website’s admin account.
- Enable Change Admin User – Change Admin account name.
- New Admin Username – Set up a new username for Admin
- Change User ID 1 – Change admin’s ID to avoid detection and Matchmaking.
There are a few more features but it will be very dangerous if you are not familiar with WordPress so I will not list them in this article. The proofs listed are enough for the security of your Site to be on an international level!! Hard to hack except Anonymous =))
These are all great tips and essential Plugins for better WordPress security! There are many other Plugins but in my opinion any is safe enough for you.
Good luck !




![[Lập Trình Game] Instructions for using AutoTile when designing games with Godot [Lập Trình Game] Instructions for using AutoTile when designing games with Godot](https://anonyviet.com/wp-content/uploads/2020/04/image005.png)