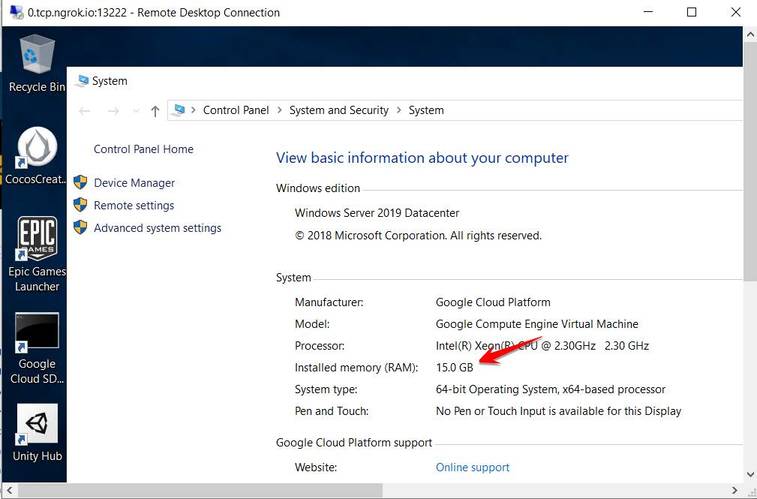
Google is giving developers a free 15GB RAM Windows VPS to test code. I tested the download speed of VPS to about 136Mbps, too fast. If you are in need of using a Windows VPS to Donwload or Upload in a short time, you can follow the instructions below:
| Join the channel Telegram of the AnonyViet 👉 Link 👈 |
Now this tut has been fixed, Tut create free 7Gb ram VPS from Githubused for 6 hours still can be used.
Because Windows VPS is free, we will have some advantages and disadvantages below, you need to read carefully and follow each step to avoid errors.
Advantage:
- 4 CPUs
- 15 Gb RAM
- HDD: 45 Gb
- Internet speed > 100Mb/s
- Free, no credit card required
Weakness:
- Time to use each VPS is about 5 hours.
- It takes a while to create an account for the first time.
Step 1. Get Ngrok . authtoken
Now you need Create account Ngrok to get access token authtoken code.
After creating an account, you go to the page https://dashboard.ngrok.com/get-started/setup.
Scroll down to see the place 2. Connect your account, Copy the authtoken code.
Step 2. Prepare Script to create Windows VPS
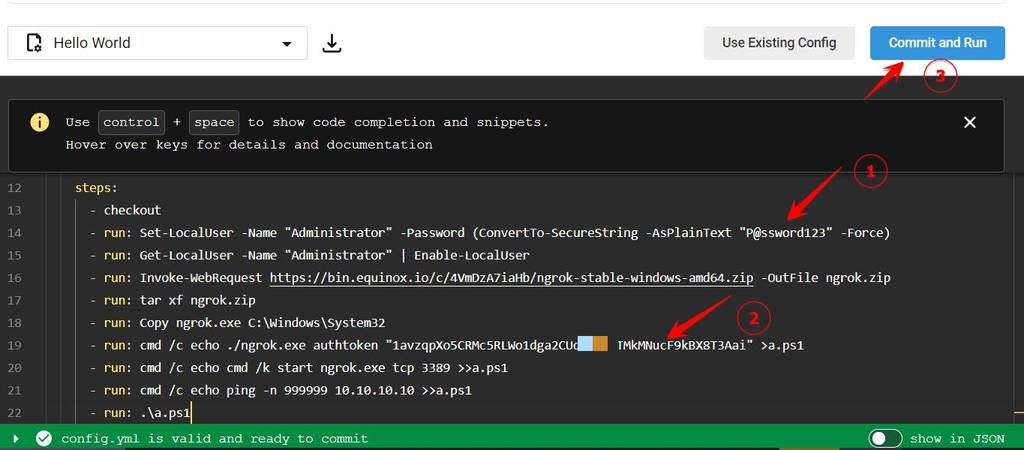
Replace YOUR_NGROK_AUTHTOKEN_HERE Fort authtoken code in Step 1. (Line 4 from the bottom counts up).
Remember to put the authtoken in the ” ” sign.
version: 2.1

orbs:
  win: circleci/[email protected]

jobs:
  build:
    executor:
      name: win/default
      size: "medium"

    steps:
      - checkout
      - run: Set-LocalUser -Name "Administrator" -Password (ConvertTo-SecureString -AsPlainText "P@ssword123" -Force)
      - run: Get-LocalUser -Name "Administrator" | Enable-LocalUser
      - run: Invoke-WebRequest https://bin.equinox.io/c/4VmDzA7iaHb/ngrok-stable-windows-amd64.zip -OutFile ngrok.zip
      - run: tar xf ngrok.zip
      - run: Copy ngrok.exe C:\Windows\System32
      - run: cmd /c echo ./ngrok.exe authtoken "YOUR_NGROK_AUTHTOKEN_HERE" >a.ps1
      - run: cmd /c echo cmd /k start ngrok.exe tcp 3389 >>a.ps1
      - run: cmd /c echo ping -n 999999 10.10.10.10 >>a.ps1
      - run: .\a.ps1
Step 3. Create a BitBucket account
First you need to create account at BitBucket. After creating, remember Check your mail to activate your account.
Note: Should use temporary algae mail to be able to create multiple accs and create multiple free 15GB RAM Windows VPS.
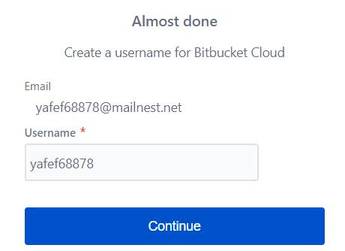
When activating mail, the web will ask to create a username, choose a username and press Tiếp tục.
Next screen tap Skip.
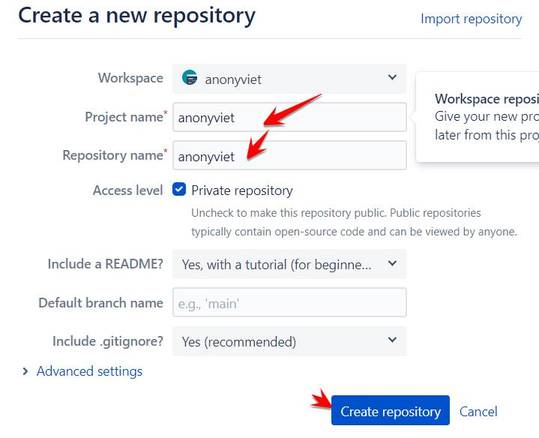
Next, select Create repository.
Name your Project name and Repository name, then press Create repository.
Step 4. Create a Circleci . account
Now you create an account at circleci.com. Click on the place Sign up with bitbucket (use the newly created Bitbucket account to login).
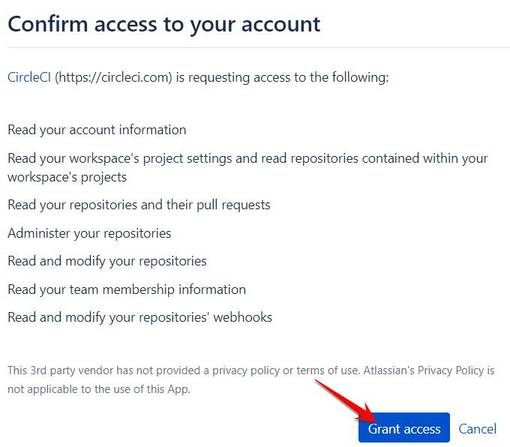
Select Grant access to grant permission circleci share an account with bitbucket.
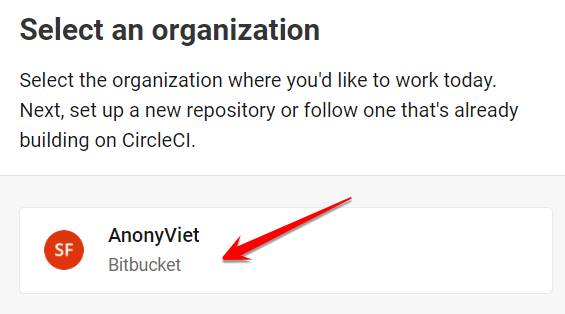
Click on Username Bitbucket you created.
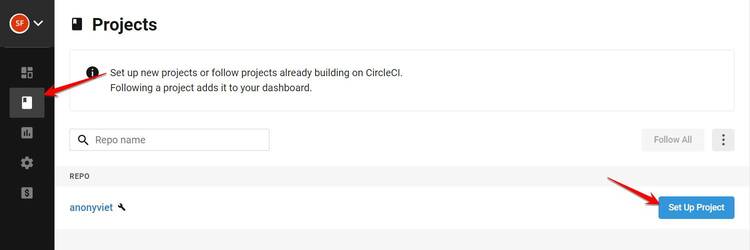
Now you will see the Reponsite name on Bitbucket appear, select Set Up Project
Copy the Script to create a Windows VPS with 15GB RAM in Step 2 into the Code editing box below, then click Commit and Run.
You wait about 1-2 minutes to create VPS, you can click on the place Build to see the progress.
Wait for the step to appear Request timed out.
Step 5. Get VPS login IP
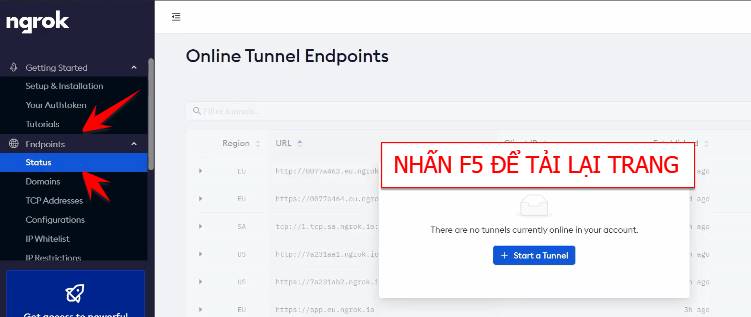
Now you access the account Ngrok created in Step 1. Select Menu Endpoint -> Status to get the Windows VPS access IP.
If the message appears There are no tunnels currently online in your accountthen you press F5 to reload the page.
And this is the IP/Host used to access VPS.
Step 6. How to Login to Google’s Free Windows VPS
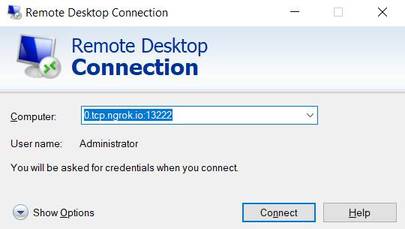
Now you open the Windows Remte Desktop program (Open RUN type command mstscpress Enter)
Enter the IP that Ngrok gave you, remove tcp:// Go.
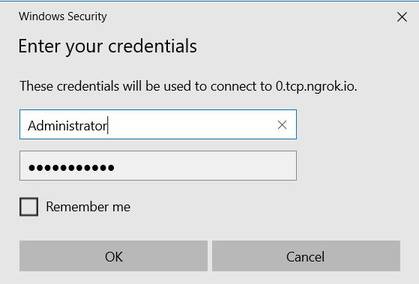
- Username: Administrator
- Password: P@ssword123
If successful, you will be able to access Google’s Windows 2019 Datacenter VPS. Now just test it out.
Note that the time to use VPS is only about 5 hours. Expiry you re-create another VPS for free, but the previous data will be lost.


